 Photomicro L Adapter
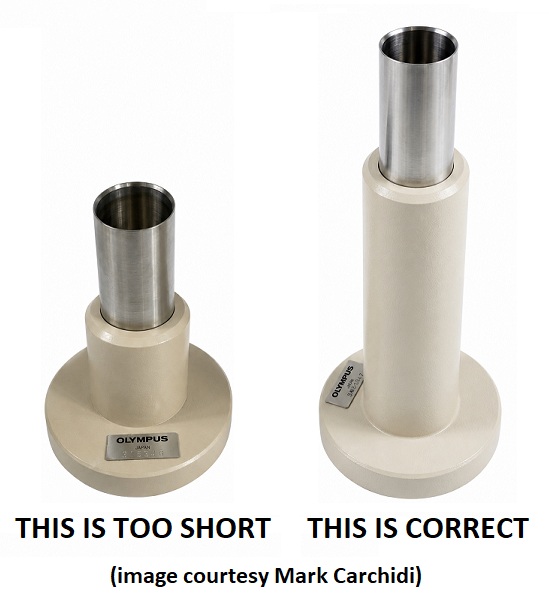
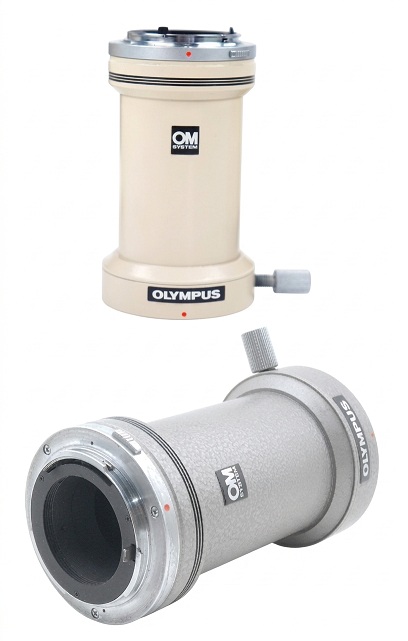
The Photomicro L Adapter (Olympus 7-C545) was the official Olympus solution for attaching an Olympus OM SLR camera body to the BH2 microscope. These were available in a metallic silver cover, to match IMT, BH, and CH scopes, as later in a cream colored version, to match IMT2, BH2, and CH2 scopes. The lower end of the Photomicro L attaches to the 38mm dovetail (with NFK port) on the trinocular head, while the upper end accepts the Olympus OM-mount camera body, placing the film or image sensor of the camera the proper distance from the NFK photo eyepiece for parfocal imaging.
The design of the system is such that when one of the Olympus NFK photo eyepieces is placed into the top bore of the trinocular head (before the Photomicro L is attached), the resulting optical configuration projects a fully corrected image of the specimen under observation directly onto the film plane or image sensor of the attached camera.
The total magnification of the resulting image, as projected onto the film plane or image sensor, is the mathematical product of the magnifications of the objective lens and the NFK photo eyepiece. For example, a 10X objective lens and an NFK 2.5X photo eyepiece will produce a total magnification of 25X at the film or sensor plane (i.e., the image projected onto the film or digital image sensor will be 25X life size).
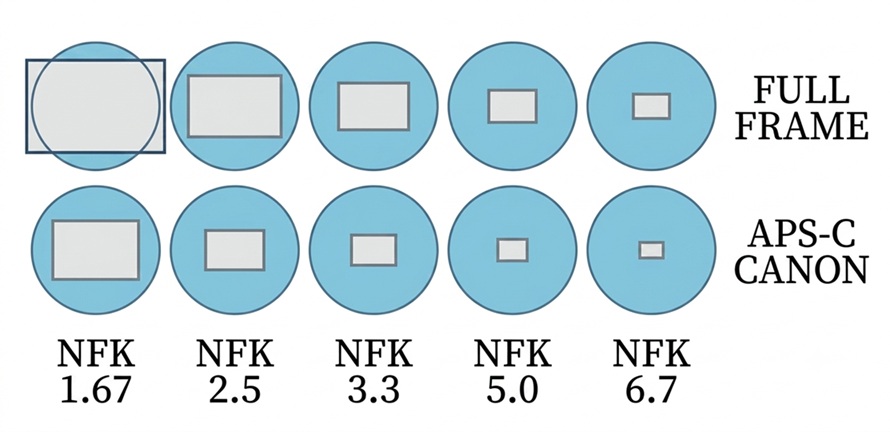
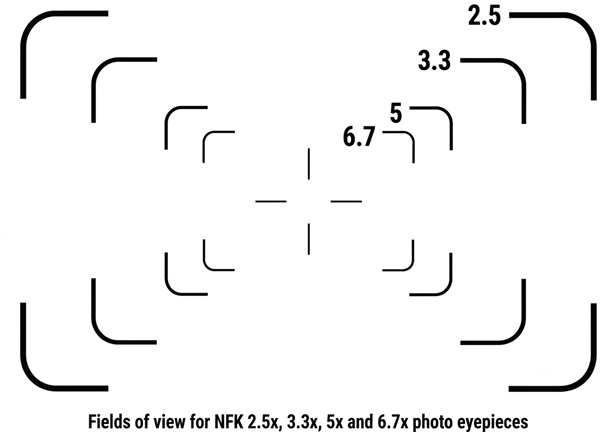
An NFK photo eyepiece must always be used in this application since it provides the necessary optical corrections for the Olympus LB objectives used in the BH2, and since it projects a focused image directly onto the film plane of the attached camera. NFK lenses of the following magnifications were available: 1.67X, 2.5X, 3.3X, 5.0X, and 6.7X.
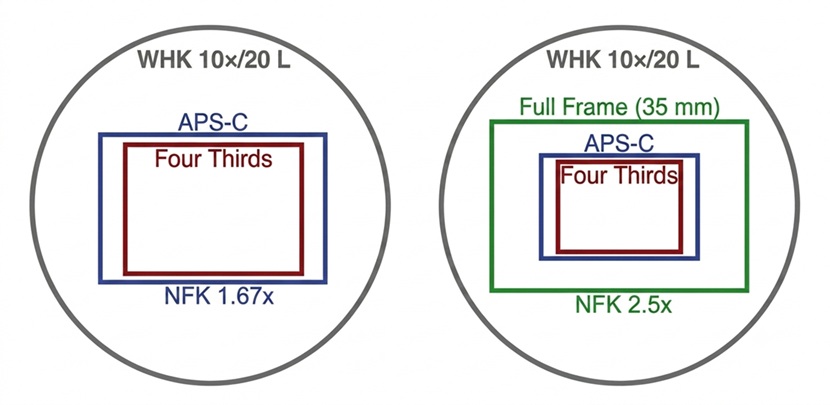
When using a standard DSLR with an APS-C or ASP-H image sensor, the NFK 1.67x is the correct photo eyepiece to use. Unfortunately, the NFK 1.67x is very rare and is therefore quite expensive (often in the range of $600 to $1000 on eBay). If instead of an APS-C or APS-H camera, you use a full-frame DSLR (which has an image sensor the size of a 35mm film frame) then the much cheaper NFK 2.5x is the correct photo eyepiece to use. The problem with this approach is that full-frame DSLR bodies, even in used condition, are about as expensive as the NFK 1.67x. If you’d like to add a camera to your BH2 without breaking the bank, you can simply do what many people do and just use an NFK 2.5x with your APS-C or APS-H camera and live with the resulting reduction in the field of view.
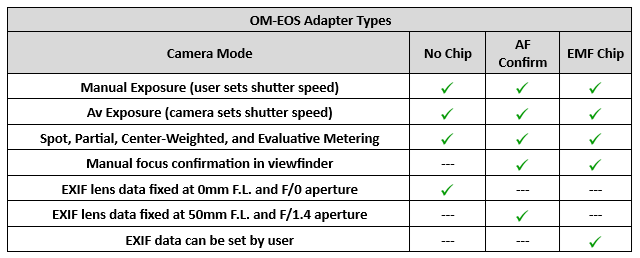
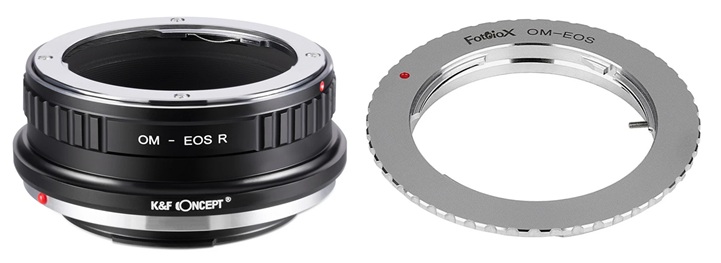
Although the Photomicro L adapter was designed for use with Olympus OM-mount cameras only, it can also be used with Canon EOS (EF mount) DSLRs or older Canon FD mount SLR equipment by adding a very inexpensive OM-EF or OM-FD adapter (available from Amazon or eBay) to provide a fully parfocal solution. Other camera types may or may not be adaptable to the Photomicro L, so be careful. Some (such as Nikon) will not provide proper positioning of the image sensor relative to the NFK photo eyepiece to achieve parfocality with the eyepieces.
In general, the following DSLR camera types can be mounted onto the Photomicro L, using the appropriate lens mount adapters, to provide parfocal imaging for the BH2: Canon EOS cameras, Sony NEX cameras, and the various 4/3 or Micro 4/3 cameras. When using a Canon EOS, use the NFK 2.5x photo eyepiece for camera models utilizing full-frame sensors, and use the NFK 1.67x for camera models utilizing APS-C sensors. When using a Sony NEX, use the NFK 1.67x projection lens. For 4/3 or Micro 4/3 cameras, the best results will be obtained using the NFK 1.67x projection lens, but even then, the field of view of the resulting images will be noticeably restricted (as compared to the view through the eyepieces). For cameras using 4/3 sensors, better results would be obtained with an MTV-3 or U-PMTVC adapter, rather than the Photomicro L, since the MTV-3 / U-PMTVC contains an integral 0.3X reduction optic to increase the field of view.
 MTV -3 / U-PMTVC Adapter
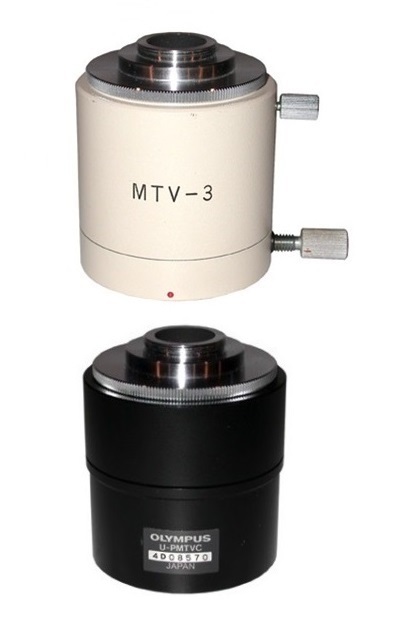
The cream colored MTV-3 adapter (Olympus 7-C555) was the official Olympus solution for attaching C-mount video cameras to the BH2 microscope. Like the Photomicro L adapter, the MTV-3 adapter connects to the 38mm dovetail of the trinocular head, along with a suitable NFK photo eyepiece, and allows the resulting optical configuration to project a finished real image of the specimen under observation directly onto the image sensor of the attached C-mount camera.
The MTV-3 differs from the Photomicro L Adapter in that the MTV-3 accepts a C-mount camera body, and contains an integral 0.3X reduction lens, whereas the Photomicro L Adapter accepts an Olympus OM-mount camera body and contains no reduction optics.
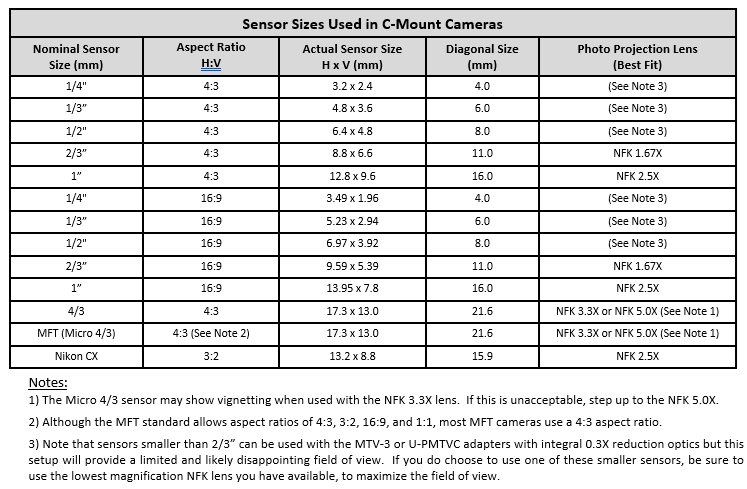
When used with an NFK 2.5X photo eyepiece, the MTV-3 with its integral 0.3X reduction lens projects a real image of approximately 16mm diameter onto the image sensor in the attached camera. This sizing is a perfect match to the 1″ sensor used in many C-mount video cameras.
Although the MTV-3 was designed for use with cameras containing a 1″ sensor, a 2/3″ sensor (which has a diameter of 11mm) is also usable with the MTV-3, but will provide a somewhat reduced field of view, compared to the 1″ sensor.
The requirement for a large sensor size unfortunately excludes many of the modern C-mount cameras out there today. The Nikon J1 and V1 cameras have a CX sensor of the proper size, and with a suitable C-mount adapter should work well with the MTV-3.
The C-mount threads and the 0.3x reduction lens within the MTV-3 adapter are integral to a top piece, which is held in place by a single thumbscrew and is therefore easily removable. The fact that the top piece with the C-mount and reduction lens can be easily removed is a mixed blessing.
On the one hand, this removable top piece makes it quick and easy to remove or attach a C-mount camera, without having to screw or unscrew the camera onto or off of a fixed C-mount. However, because this top piece was removable, many of the MTV-3 adapters available on eBay these days (perhaps even most) are missing this critical piece.
Many potential buyers of the MTV-3 (and likely many sellers, as well) do not know that these adapters are incomplete. Be sure to look for this critical piece if you intend to buy an MTV-3, since you cannot attach a C-mount camera without it.
If, on the other hand, you would like to buy an MTV-3 for the sole purpose of installing a T-mount camera to the BH2 (as described in this video), you will only need the outer tube. The MTV-3 outer tube was used for this particular project because the MTV-3 contains an elegant and well engineered mounting mechanism which will not mar the 38mm dovetail on the trinocular head. Whatever you do, please do not pay full price for a bare MTV-3 tube. Point out to the seller that what they have is only half of an MTV-3 and pay accordingly.
As an alternative to the MTV-3, the very similar Olympus U-PMTVC adapter (Olympus U-V210), which was made for later BX microscopes, can be used to attach a C-mount camera to the BH2. The black U-PMTVC has one advantage over the cream-colored MTV-3, in that the design allows for a slight adjustment of the optical length to tweak the parfocality of the attached camera. This is accomplished by loosening two set screws and rotating the bottom piece, relative to the top piece, until the camera is parfocal to the eyepieces, then snugging the set screws to hold this focus setting.
Olympus specified the reduction factor of the MTV-3 in a non-standard way. A C-mount reduction factor is normally stated to be relative to a 1″ sensor, such that a C-mount adapter with a 1.0x reduction factor would require a 1″ sensor, whereas an adapter with a 0.3x reduction factor would require a 1/3″ sensor. In contrast to this, Olympus specified their reduction factor using the standard NFK 2.5 photo eyepiece for 35mm cameras. The NFK 2.5 produces a real image of 48mm diameter, so the 0.3x reduction factor within the Olympus MTV-3 reduces this down to 16mm, for compatibility with a standard 1″ image sensor used in many video cameras. So, this means that an industry standard C-mount adapter with a 0.3x reduction requires a 1/3″ sensor, the Olympus adapter, with a 0.3x reduction, requires an NFK 2.5x and a 1″ sensor.
The table below lists various sensor sizes that were commonly used in C-mount cameras, along with the most appropriate NFK photo eyepiece for each of these sensor sizes. In addition to the standard CCD sizes, this table also includes the 4/3, Micro 4/3, and Nikon CX sensor sizes, which are used in many modern mirrorless cameras and can be converted to C-mount using inexpensive and readily available adapters. DSLRs are generally not suitable for use with the MTV-3 / U-PMTVC since the mirror-swing of a DSLR prevents the C mount threads from being close enough to the image sensor plane to achieve parfocality with the microscope eyepieces. DSLRs can be used with the BH2 when connected with the Photomicro L Adapter.
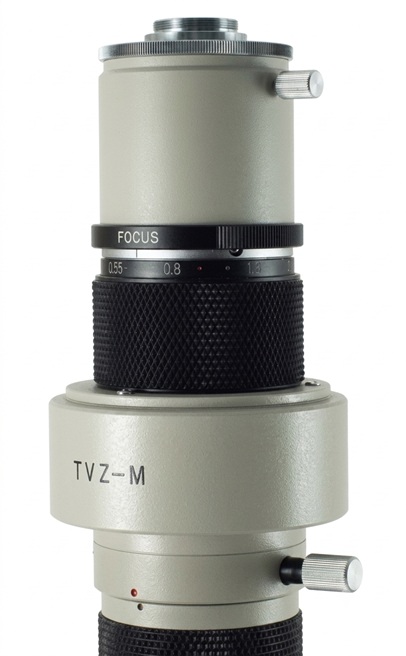 TVZ-M Zoom Video Lens
Olympus made the TVZ-M Zoom Video Lens (Olympus # 7-C567), which was a device of 2-piece construction with a parfocalizing collar and a C-mount adapter that was removable from the main body.
The TVZ-M was mounted onto the 38mm dovetail of the trinocular head or PM-ADF adapter and had a variable magnification range of 0.55x to 1.1x.
The TVZ-M performed the compensation for the lateral chromatic aberration in the intermediate image that was normally provided by the NFK photo eyepiece, and was therefore used without an NFK photo eyepiece in the setup.
There seems to be very few of these in existence, and they are true BH2 Unicorns.
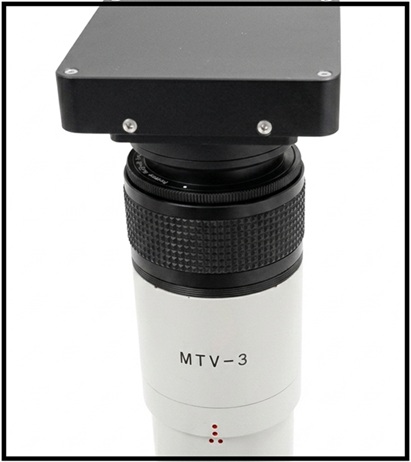 T-Mount Using MTV-3
Olympus made no provision for attaching a T-mount camera to the BH2. The Empire of Dirt Workshop has developed a simple 3D-printable adapter which allows a bare MTV-3 tube to be used to attach to the NFK port on the trinocular head, along with a helicoid focus and a few adapters, to provide a parfocal T-mount for the BH2.
Once you have a T-mount, you can then adapt to a great many camera types using the appropriate T2 T-rings.
See this video for details of building and using this adapter on your BH2. If you wish to use this method, be sure to adjust the helicoid for proper parfocalization with the eyepieces using a low-power objective.
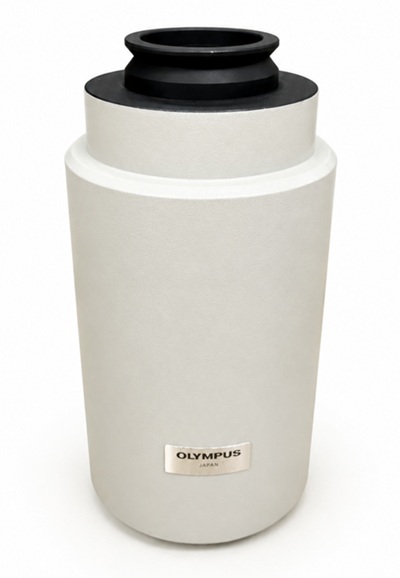 IMT2-PT
In addition to the BH2-PT described above, Olympus also made IMT2-PT phototube, which was intended for the IMT2 inverted scope. The IMT2-PT also works well on the BH2.
Like the BH2-PT, the IMT2-PT can replace the traditional binocular or trinocular viewing head and provide a camera port (without requiring the PM-ADF adapter).
The Photomicro L adapter or the MTV-3/ U PMTVC adapter (or suitable third party alternative) attaches to the 38mm dovetail of the IMT2-PT, along dropping an NFK photo eyepiece into the NFK port on the IMT2-PT.
Like the BH2-PT, you lose the ability to directly view the image through the ocular lenses, but when using a suitable camera with live-view functionality, this can also be a workable option for some people.
 BH2-PT
The Photomicro L Adapter and the MTV-3 / U-PMTVC setups described above can be rather expensive, especially when you factor in the cost of the required NFK photo eyepiece and the potential upgrade from a binocular to a trinocular head. One way to lower the total cost of these solutions is to eliminate the viewing head from the setup entirely.
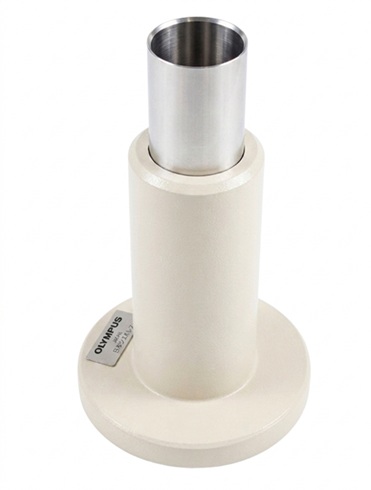
Olympus offered a BH2-PT vertical phototube, which is essentially a vertical monocular tube for the BH2. When used with the PM-ADF adapter to provide the required 38mm NFK photo eyepiece port, this phototube can replace the traditional binocular or trinocular viewing head and will allow a camera to be attached to the BH2.
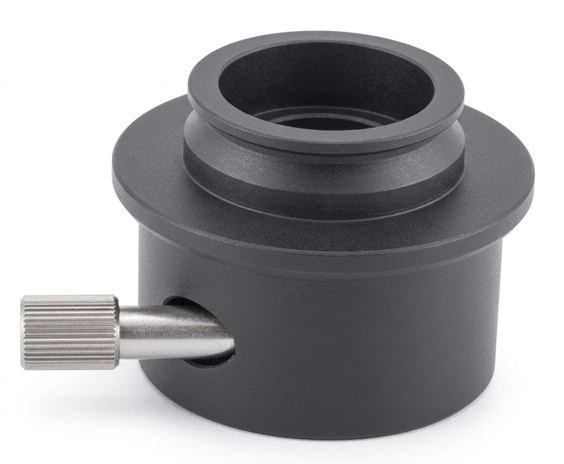
The Photomicro L adapter or the MTV-3/ U PMTVC adapter (or suitable third party alternative) attaches to the 38mm dovetail of the PM-ADF adapter (after dropping a suitable NFK photo eyepiece into the NFK port of the PM-ADF). You of course lose the ability to directly view the image through the ocular lenses, but when using a suitable camera with live-view functionality, this can be a workable option for some people.
The BH2-PT can occasionally be found on eBay. Be sure to read the warning below before buying a BH2-PT.
 PM-ADF
The PM-ADF adapter mounts onto the 23mm ocular tube of the BH2-PT, and provides a 38mm NFK photo eyepiece port.
 Camedia Adapters
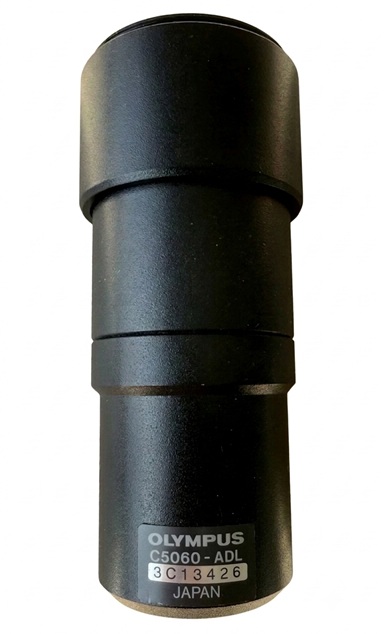
Olympus made a series of adapters to allow their Camedia 2000, 3000, 4000, and E-series cameras to be attached to the BH2 using the MTV-3 C-mount adapter. These include the following.
- C3040-ADL
- C5060-ADL
 Diagnostic Instruments PA1-10
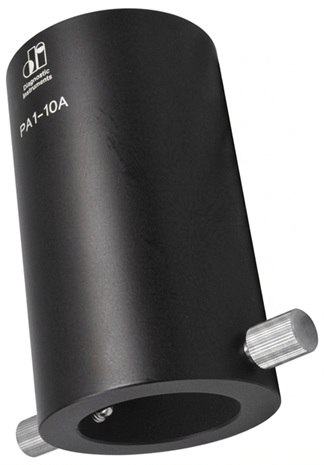
The Diagnostic Instruments (more recently, Spot Imaging) PA1-10A camera adapter was a third-party alternative to the Olympus Photomicro L adapter. Although the PA1-1-A is no longer manufactured, it can often be found on the used market at a lower cost than the Photomicro L adapter. As with the Olympus solution, the PA1-10A provides a camera mount that’s parfocal with the viewing oculars to produce fully corrected images.
Like the Photomicro L adapter, the PA1-10A attaches to the 38mm dovetail on the BH2 trinocular head and must be used with a suitable NFK photo eyepiece. The PA1-10A differs from the Photomicro L adapter in that instead of an Olympus OM mount on the top, it features T2 threads (42mm x 0.75mm), to allow various camera body types to be attached using the appropriate T2 T-ring adapters.
Diagnostic Instruments sold the EOSC-T2 T-ring adapter to allow Canon EF-mount camera bodies (e.g., EOS) to attach to the PA1 10A, and the CANC-T2 T-ring adapter to allow standard Canon FD-mount bodies to be attached, but these also are no longer manufactured and can be quite hard to find these days. Fortunately, generic T2 to EF and T2 to FD T-ring adapters are readily available at low cost on eBay or Amazon which can be used to attach Canon cameras to the PA1-10A.
It should be noted that there are two distinct variations of this Diagnostic Instruments adapter that can be found in the wild, both of which are marked as “PA1-10A”. One variation has a circular dovetail on top with female T2 threads internal to the dovetail, while the other variation has male T2 threads.
Click here to see a PDF of a Diagnostic Instruments brochure which features this adapter.
 What About the Other Diagnostic Instruments Adapters?
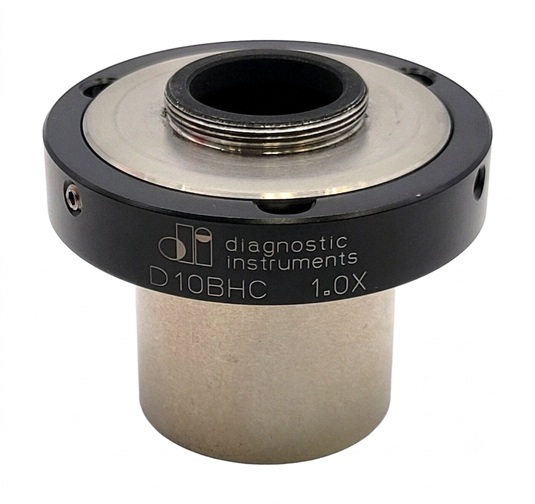
Diagnostic Instruments made multiple C-mount adapters that were sold as compatible with the BH2. Although these adapters were sold as compatible with the BH2, they did not allow for the inclusion of an NFK photo eyepiece in the optical path, and did not perform the optical compensation that was normally provided by the NFK eyepiece.
Because of this lack of compensation, they provided images with significant lateral chromatic aberration and should therefore not be considered to be “compatible with the BH2”. Models were available for 1/2″, 2/3″, and 1″ image sensors, as listed below:
- DD50BHC (black, 0.5x, for 1/2″ sensors)
- DD63BHC (black, 0.63x, for 2/3″ sensors)
- DD10BHC (black, 1.0x, for 1″ sensors)
Click here to see a PDF of a Diagnostic Instruments brochure which features these adapters.
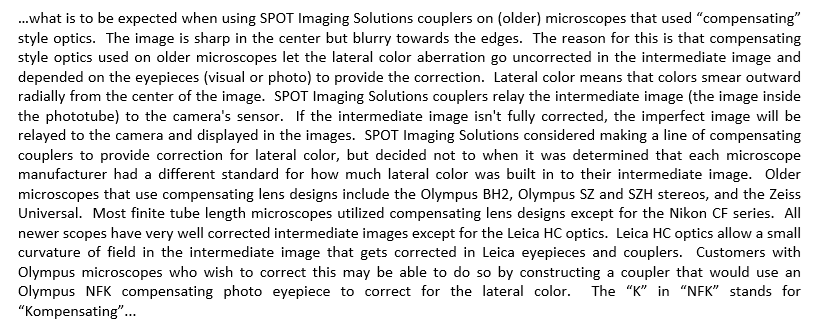
I once asked Spot Imaging (formerly Diagnostic Instruments) about the older adapters (excluding the PA1-10A discussed above) that they used to sell for the BH2. An excerpt of their response is included below. Based on this response, I would not use any Diagnostic Instruments adapters other than the PA1-10A on a BH2 scope, as they are not technically suitable for the BH2.
 Kinch Adapter
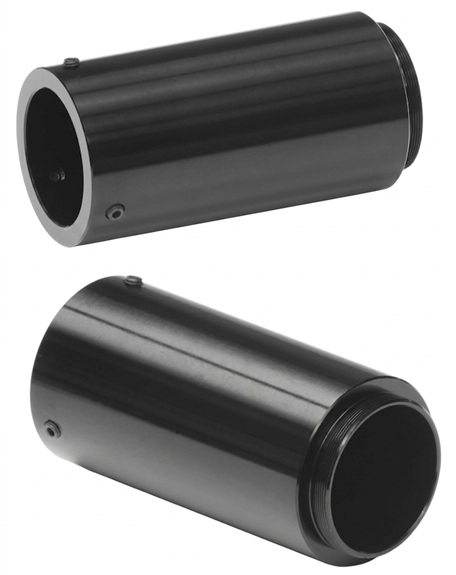
Since neither the Olympus Photomicro L nor the Diagnostic Instruments PA1-10A adapter are currently manufactured, a better option might be the Olympus 38mm to T-Mount adapter manufactured by Richard Kinch, at http://www.truetex.com/olympus-38mm.htm.
Like the Olympus Photomicro L adapter and the Diagnostic Instruments PA1-10A adapter, the Kinch adapter secures to the 38mm dovetail on the trinocular head, along with an NFK photo eyepiece, and through the use of a suitable T-mount adapter, accepts a compatible DSLR (e.g., Canon EOS) to provide a parfocal solution to produce fully corrected images.
 USB Eyepiece Cameras
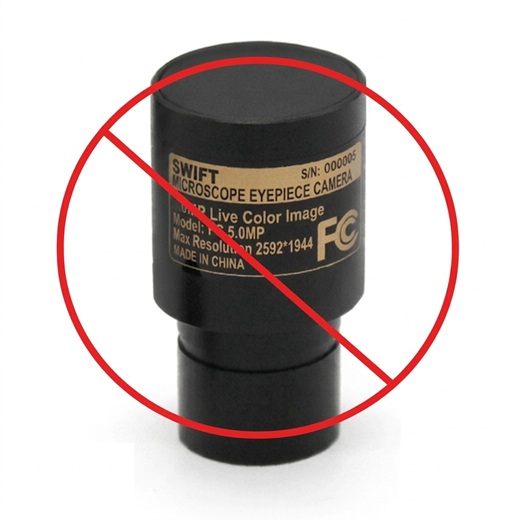
“So, what about those little drop-in USB cameras sold by companies like Swift and Amscope, that replace one of the eyepieces. Surely those will work?”
No, unfortunately they will not work properly on the BH2. Since the optical design of the BH2 relies on the eyepieces or the NFK photo eyepieces to provide some of the required correction for chromatic aberration, replacing an eyepiece with one of these little cameras will produce images with significant uncorrected lateral chromatic aberration.
This will be visible in the resulting images as color fringing which gets progressively worse the further you get away from the optical axis (i.e., the center of the image).
Now, if you were to replace the Olympus LB objectives on your BH2 with Nikon CF (Chromatic-aberration Free) objectives from the same era (or some other fully compensated objectives), the little eyepiece camera would drop in and work just fine, since all the compensation for chromatic aberration would be provided within the objectives themselves.
But Nikon optics on a BH2 feels like giving up.
 Afocal Imaging
A time-honored approach to photomicrography is to simply position the lens of a camera very close to one of the eyepieces and shoot photos afocally through the eyepiece. When done correctly, the resulting images can be of very high quality.
A problem with this method is that it is rather awkward to position a camera to shoot down one of the eyepieces on the BH2, since the BH2 eyepieces are inclined (i.e., not vertically oriented). Additionally, the presence of the camera on one eyepiece makes it difficult to look through the remaining eyepiece.
Because of this, it is tempting to instead just drop an eyepiece into the NFK port of the trinocular head and proceed that way. The problem with this approach is that it doesn’t generally work, since the diameter of the NFK bore is too small to accept the normal WK10X or WHK10X eyepieces. They will go in part way, but they will not seat to the proper position to make the camera images parfocal with the eyepieces. If you’re using a BH2-PT phototube, the solution is simple. Just remove the PM-ADF adapter and drop your 10X eyepiece directly into the ocular tube of the BH2-PT. A WHK is better here than WK, since it has a higher eyepoint, but either of these can be made to work.
Another lesser-known option is to use a WHK15-L eyepiece in the NFK port. So long as you use the regular “-L” version and not the “-H” helicoid version, it will drop right into the NFK port just fine. The 15x eyepiece will provide a reduced field of view as compared to a normal 10X eyepiece (it will be similar to that obtained using an NFK 2.5X with an APS-C or APS-H camera) but that may still be an option for you.
Another way to take the occasional image without spending a lot of money is to just take images afocally using your smartphone. Simply hold the phone up to one of the eyepieces and snap the picture. It sounds a bit easier than it actually is, because you have to be very careful to make sure that the camera is properly aligned with the optical axis of the eyepiece before taking the shot. But with a little care in alignment, the results can be excellent.
There are inexpensive adapters available to allow a smartphone to mount onto a microscope eyepiece and be adjusted for proper alignment with the eyepiece. Once you get that part working, you can experiment with the digital zoom function of the camera to prevent vignetting of the images.